Introduction to Matching Timber Grain Patterns in Resin Tables
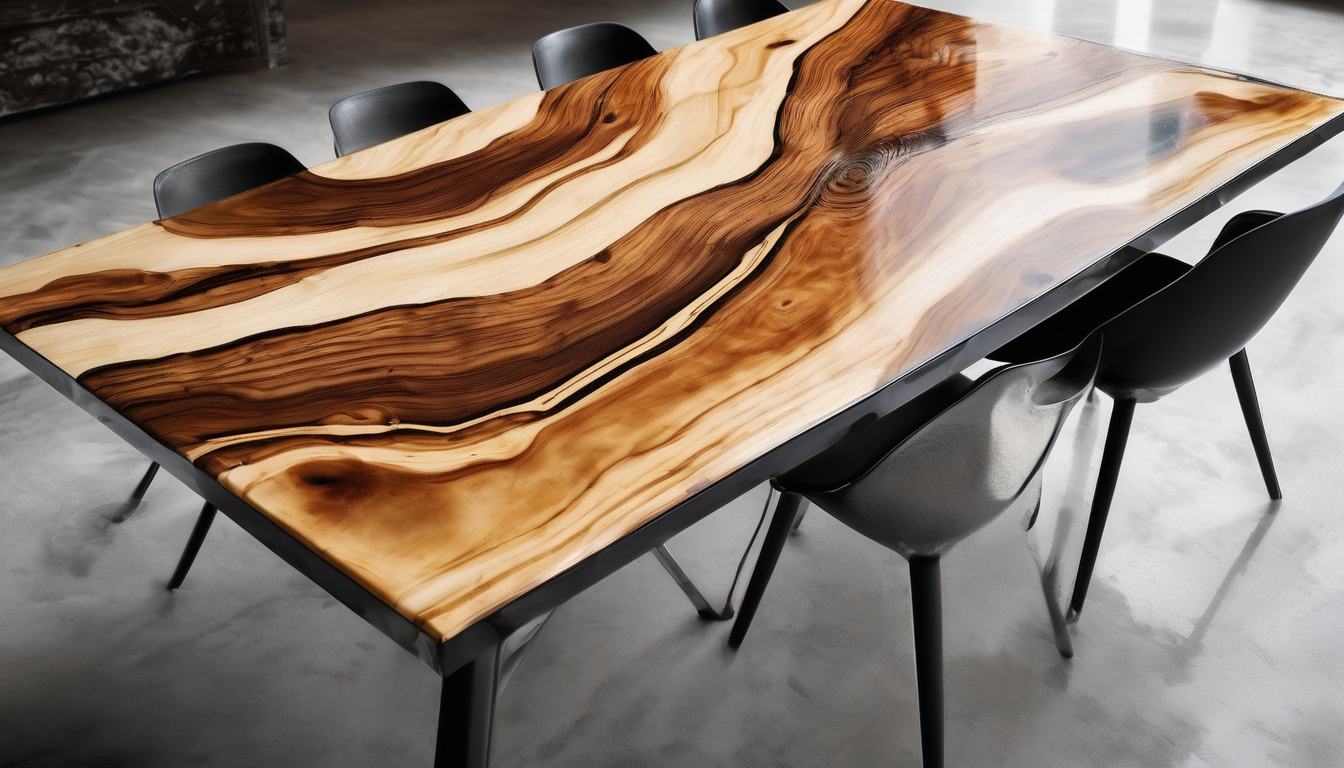
Matching timber grain patterns in resin tables can elevate the beauty and uniqueness of your dining room or office space. This technique involves aligning the natural wood grains with the clear, transparent resin pour, creating a seamless transition that showcases both materials’ inherent characteristics. In this article, we will explore six key steps to achieve harmonious grain pattern matching when crafting bespoke solid wood and resin dining tables.
Matching Timber Grain Patterns In Resin Tables – Selecting Appropriate Hardwood Species for Grain Matching
Selecting the right hardwood species is crucial when matching timber grain patterns in resin tables. Each type of wood has distinct characteristics that will influence how it interacts with the resin pour. For instance, oak and walnut offer a bold and dramatic grain pattern suitable for high-contrast designs, while maple provides a more subtle, uniform look.
Considering Timber Characteristics
When selecting timber, consider its density, stability, colour variation, and the presence of knots or other natural features. These elements will impact how well the grain patterns align with each other and the resin once poured.
Matching Timber Grain Patterns In Resin Tables – Evaluating Grain Patterns in Raw Materials
Evaluating the raw materials before cutting is essential to ensure that the timber’s natural grain patterns are consistent. This involves examining large slabs of wood for uniformity and selecting pieces with similar characteristics.
Matching Grain Patterns Before Cutting
To match grains effectively, lay out the raw timber side by side to identify similarities in pattern and orientation. Ensure that each piece has a consistent grain flow to maintain uniformity throughout the final table top.
Preparing the Workspace and Tools
A clean and well-organized workspace is essential for precision work such as matching timber grain patterns in resin tables. Ensure that your tools are sharp, calibrated, and ready to use.
Cleaning the Workspace
Remove any debris or dust from the surface where you will be working. Use tack cloths or compressed air to ensure a clean base for your project.
Cutting and Sanding Timber to Reveal Grain Patterns
The cutting phase is critical as it determines the final look of your table top. Use high-quality saw blades and sandpaper to reveal the timber’s natural grain.
Careful Cutting and Sanding Process
Cut each piece with a fine-toothed blade and use progressively finer grits of sandpaper, starting from 120-grit and finishing at 600-grit. This process will reveal the wood’s grain without damaging it.
Pouring Resin Over Matched Grain Patterns
The resin pour is where the magic happens, seamlessly blending timber and resin to create a stunning visual effect. Ensure that the resin is at the correct temperature and viscosity for optimal pouring.
Techniques for Effective Resin Pours
Use a slow pour technique to allow the resin to flow smoothly over the timber grain, ensuring it fills all gaps and crevices without pooling or leaving air bubbles. Apply heat as needed to thin out thickened resin.
Finishing and Polishing the Completed Table Top
Once the resin has cured, finish and polish the table top to a high shine that highlights both materials’ beauty. This final step ensures durability and enhances the aesthetic appeal of your bespoke dining table.
Finishing Techniques
Apply a clear coat of varnish or wax over the resin pour, then buff it to a high shine using fine-grit pads and cloths. This step protects the surface while preserving its natural beauty.
Expert Tips for Matching Grain Patterns
- Use consistent lighting to evaluate timber grain patterns accurately.
- Align grain patterns across multiple pieces before cutting them down.
- Choose resin with UV stabilizers to prevent yellowing over time.
- Work in a temperature-controlled environment for optimal results.
FAQ on Matching Timber Grain Patterns
- Q: What is the best way to evaluate timber grain patterns?
A: Place pieces side by side under consistent lighting, such as natural daylight, to assess the consistency and orientation of the grains.
- Q: Can I use any type of wood for resin tables?
A: While most hardwoods can be used, certain species like oak or walnut may offer more dramatic grain patterns ideal for resin projects.
- Q: How do I prevent air bubbles during the pour?
A: Use a slow pour technique and apply heat to thin out thickened resin. Pouring in layers can also help eliminate air pockets.
Conclusion
Matching timber grain patterns in resin tables requires careful planning, precise execution, and attention to detail. By following these six key steps, you will be able to craft stunning dining room or office furniture that showcases the beauty of both natural wood and clear resin.
