Live edge resin river kitchen islands have become one of the most sought-after centrepieces in contemporary British kitchens, blending the warmth of natural timber with the visual drama of coloured or clear epoxy rivers. Whether you’re renovating a Georgian terraced kitchen in Bristol or fitting a coastal home in Cornwall, Live edge resin river kitchen islands offer bespoke character, robust worktop performance and opportunities to reflect local materials and style.
This guide lays out everything you need to know: how they’re built, timber and resin choices, step-by-step production, costs and timeframes in the UK, design options, installation and maintenance, plus health & safety and environmental considerations specific to homeowners in Bristol, Somerset, Dorset and surrounding counties. This relates directly to Live Edge Resin River Kitchen Islands.
Understanding Live edge resin river kitchen islands
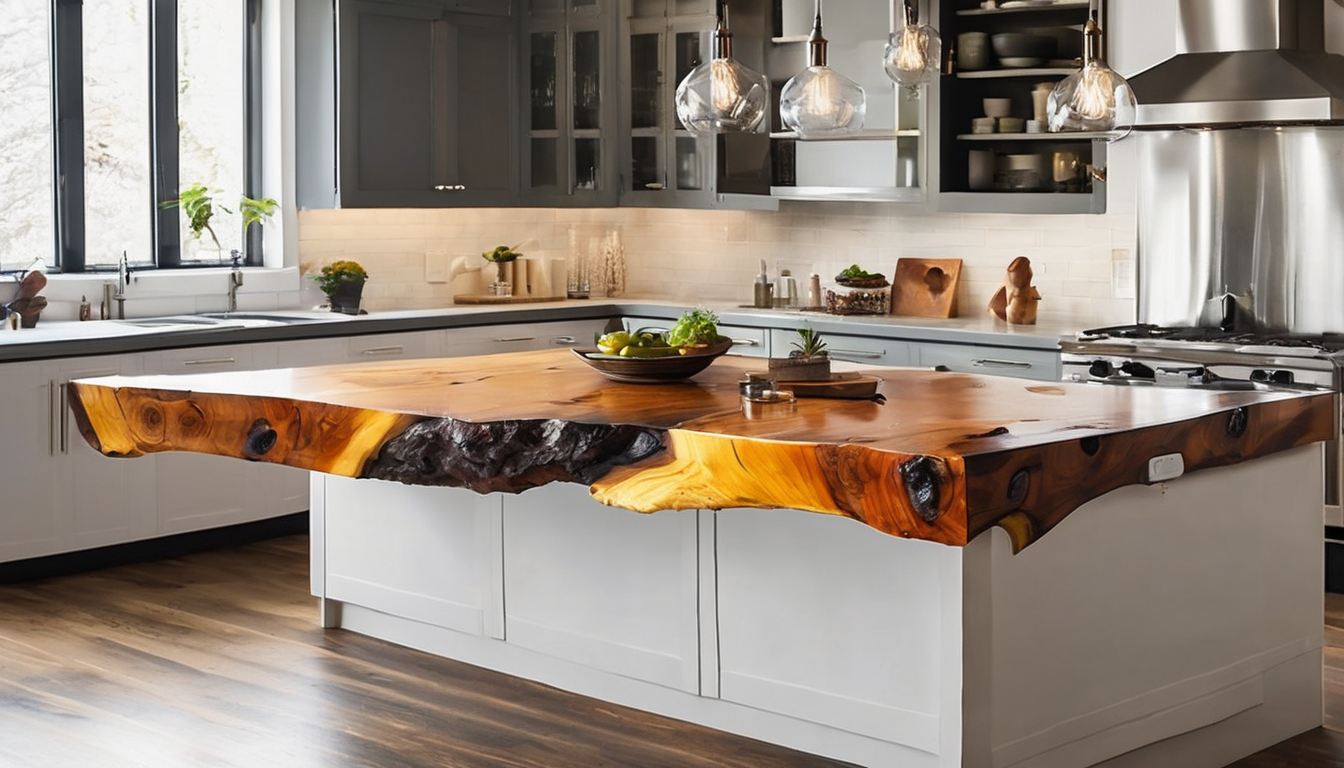
Live edge resin river kitchen islands are bespoke worktops created by joining live-edge timber slabs with a poured epoxy or polyester resin “river” running between them, often finished as a freestanding kitchen island that doubles as a preparation surface, breakfast bar and social hub.
The name emphasises two features: live edge — the natural, waney edge of timber kept intact for character — and resin river — a transparent or coloured epoxy channel that fills the gap and becomes a durable surface when cured.
Why choose Live edge resin river kitchen islands
A Live edge resin river kitchen islands design offers several advantages for homeowners in Bristol, Dorset and the wider South West:
- Unique aesthetics: every island is one-of-a-kind because of the timber grain and natural edges.
- Functional durability: when correctly specified and cured, epoxy creates a hard, stain-resistant surface suitable for kitchen use.
- Custom sizing: islands can be made to awkward footprints and matched to existing cabinetry or floorplans typical in period homes.
- Design flexibility: colours, translucency, inclusions (metallic pigments, shells, LED lighting) and waterfall edges allow strong personalisation.
Design variations and styles for Live edge resin river kitchen islands
Design options are broad. Choosing a style depends on your home’s character, kitchen workflow and budget. Below are major directions.
Natural and minimal
Clear resin or very lightly tinted pours that emphasise timber grain suit period homes and neutral schemes often found in Bath and Bristol, preserving the wood’s character while adding a modern twist.
Ocean-inspired and coloured rivers
Blue, teal and sea-glass tones are popular for coastal properties across Cornwall and Dorset, echoing local seascapes. Pigmented epoxy can be opaque or translucent for depth.
Waterfall edges and integrated sides
Waterfall islands carry the resin and wood down the side(s) for a continuous visual flow; this is a high-impact finish often used in contemporary new-builds or open-plan kitchens.
Embedded features and lighting
Embedded materials (pebbles, shells, brass inlays) and LED strips beneath translucent resin add drama at night and are ideal for creating a hospitality-style island in larger homes across Gloucestershire or Wiltshire.
Mixed-material islands
Combine live-edge resin tops with stone or lacquered cabinets for durability and easier matching with existing kitchen units typical in UK renovations.
Timber selection and sourcing for Live edge resin river kitchen islands
Choosing the right timber is central to success. Consider species, drying, thickness and provenance.
Common species and character
Walnut, oak, sycamore (maple), elm and ash are common choices in the UK for their attractive grain and stability. Walnut provides deep chocolate tones, oak gives rustic texture, and sycamore yields lighter, contemporary looks.
Moisture content and drying
Always use kiln-dried or properly air-dried timber (moisture content typically 6–10% for indoor worktops) to avoid movement, cupping or cracking after the resin pour.
Live edge condition and preparation
Remove loose bark and degraded wood; consolidate soft areas (see Repair section) so the resin bonds well. Ensure slabs are flattened or carefully plan for an intentionally uneven surface if using resin for levelling.
Local sourcing and reclaimed timber
Using reclaimed or locally-sawn slabs helps sustainability and ties the island to local character — particularly appealing in Bristol, Somerset and Devon. Reclaimed oak beams or local walnut can add provenance and reduce embodied carbon.
Resin types and technical considerations
Not all resins are equal. For kitchen islands you need a resin with high UV stability, food-safety potential, low-bubble behaviour and sufficient hardness.
Epoxy vs polyester vs polyurethane
Epoxy is the most common for river islands because of clarity, adhesion and mechanical properties. Polyester is cheaper but more odorous and less stable; polyurethane is used for coatings but is less common as a bulk pour material.
Food-safety and surface coatings
Many epoxies are not inherently food-safe until fully cured and/or when sealed with a certified food-contact topcoat. For food-prep surfaces consider following the manufacturer’s guidance or applying a food-safe finish on any area that will be used directly for cutting or contact with food.
UV stability and yellowing
Choose a UV-stable epoxy with appropriate additives for long-term clarity, especially important for islands by windows in Cornwall or south-facing kitchens in Wiltshire. Pigmented resins can mask slight yellowing, but high-quality clear epoxies reduce this risk.
Working temperatures and cure times
Epoxy cure is temperature sensitive. Ideal workshop temperatures are typically 18–25°C; cooler conditions extend cure times and raise risk of incomplete cure. Large pours generate exotherm heat—manage pour depth and resin chemistry accordingly.
Step-by-step build process for Live edge resin river kitchen islands
This section describes the typical workflow used by professionals; timings will vary with size, resin system and workshop setup.
1. Design and measurement
Confirm island footprint, sink/hob positions, leg locations and service access. Consider weight for floor load calculations in older Bristol terraces.
2. Slab preparation and flattening
Flatten slabs with a planer/jointer or have them flattened at a mill. Remove bark and clean live edges. Repair voids or bark pockets with consolidant or sacrificial filler to prevent resin contamination.
3. Build a leak-proof mould
Construct a sealed mould (plywood with release tape or sealed melamine) sized slightly larger than the final top; ensure it is perfectly level to avoid uneven resin thickness. When considering Live Edge Resin River Kitchen Islands, this becomes clear.
4. Seal the timber
Brush-on a thin seal coat of epoxy to lock in dust and bubbles. This first coat reduces air release from the wood during the main pour.
5. Clamp and place slabs, create dams
Position live edges facing the river gap; clamp slabs to a flat reference and ensure rigid dams hold the resin. Place resin in stages where necessary to control exotherm.
6. Pouring epoxy
Mix resin and hardener precisely, degas if needed, and pour into the mould. Use multiple shallow pours for deep rivers to limit heat. Use pigments, flakes or metallic powders to craft the desired visual effect.
7. Bubble control and finishing
Use a heat gun or torch carefully to pop surface bubbles (maintain safe distance to avoid scorching timber). After the epoxy cures, remove the mould and sand progressively up to fine grit, then polish for gloss or apply a satin topcoat.
8. Cutting, routing and edge finishing
Trim to final dimensions and route any sink/hob cutouts. For waterfall edges, mitre-join and pour resin into the joint area or construct integrated resin side panels before final sanding.
9. Mounting and cabinetry integration
Secure the island top to a suitably reinforced carcass. Pre-drill and avoid screwing directly through large resin areas where possible to reduce stress.
Costs and timelines in the UK (Bristol & South West)
Costs depend on timber species, slab size, resin volume, inclusions, finish level and whether you commission a craftsman or workshop. Typical lead times vary with complexity and seasonality.
Typical cost ranges (guide only)
Commissioned Live edge resin river kitchen islands in the South West commonly range from around £2,500.00 for smaller, simpler designs to £12,000.00+ for large, high-end waterfall islands with premium timber, complex pigments and integrated services.
For budgeting:
- Small island top (1.2–1.5 m) with simple clear epoxy and oak: approx £2,500.00–£4,500.00.
- Medium island (1.8–2.4 m) with walnut, coloured pigments and light inclusions: approx £4,500.00–£8,000.00.
- Large waterfall island with premium slab, deep pours, LED/metallic effects and on-site installation: £8,000.00–£15,000.00+.
These ranges reflect bespoke labour, high quality resins, and UK workshop overheads; reclaimed or locally sourced slabs can alter budgets favourably. Allow VAT and delivery/installation in your total.
Timeframes
A straightforward top in a well-equipped shop can take 1–3 weeks from slab prep to finished top (including cure and finishing), while complex projects with deep pours, multiple stages and on-site work typically require 4–8 weeks, plus any statutory building work time for services.
Installation, structure and plumbing/electrics
Planning the island’s structure and service runs before fabrication saves time and prevents costly alterations.
Structural considerations
Live edge resin river kitchen islands are heavy. A typical large island can weigh several hundred kilograms; ensure floor joists in older Bristol or Somerset homes are assessed and reinforced if necessary.
Fixings and support
Use continuous battens, timber frames or a metal subframe to distribute the load evenly. Avoid point loads directly under resin areas; attach to the carcass using countersunk fixings in timber areas.
Plumbing and electrics
If you require a sink, waste or hob, coordinate with your installer and local trades — confirm cutout positions prior to final surfacing. Integrate pop-up sockets and LED wiring during the build to conceal conduits within the carcass.
Care, maintenance and repair
With the right care, a Live edge resin river kitchen islands surface will remain attractive for years.
Daily care
Wipe spills promptly with a soft cloth and mild detergent. Avoid abrasive cleaners and scouring pads. Use chopping boards for cutting—most epoxies resist dents but are not designed for heavy knife use.
Periodic maintenance
Re-oil raw timber edges annually if left unsealed, and inspect seals around sinks. For high gloss epoxy, occasional polishing with an appropriate compound restores shine.
Minor repairs
Light scratches on epoxy can often be buffed out with fine abrasive polish; deeper gouges may require re-filling with matching epoxy and re-finishing. For timber splices or rot, a local carpenter can splice in new timber or use epoxy consolidation techniques.
Health, safety and environmental considerations
Working with epoxy requires attention to health and environmental factors.
Workshop PPE and ventilation
Use nitrile gloves, eye protection and appropriate respirators when mixing and pouring resins. Ensure good extraction and ventilation in the workshop to manage styrene (for polyester) or VOCs (for some epoxies).
Waste and environmental impact
Dispose of leftover mixed resin responsibly; cured epoxy is inert but liquid waste and containers must follow local hazardous waste guidance. Where possible choose low-VOC, bio-based resins or responsibly-sourced timber to reduce environmental impact.
Regulatory considerations in the UK
Any structural changes or services to a kitchen island (moving hobs, gas lines, or altering joists) may require building regulations or compliance with Gas Safe and NICEIC rules—consult local professionals in Bristol, Bath or your local council.
Expert tips and key takeaways
- Plan weight and joist reinforcement early—older houses in Bristol often need strengthening before heavy islands are installed.
- Choose kiln-dried slabs with stable moisture content (typically 6–10%) to reduce movement after installation.
- For deep resin pours, stage pours to control exotherm and reduce cracking; professional shops will often do pours in layers over several days.
- Ask your supplier about UV-stable epoxy and a food-safe topcoat if the surface will be used for food prep without boards.
- Consider local timber and reclaimed slabs for provenance and reduced carbon footprint—useful for heritage properties in the South West.
- Budget realistically: bespoke islands are labour-intensive and the cost reflects both material rarity and specialist skills.
Conclusion
Live edge resin river kitchen islands combine the authenticity of natural timber with the versatility of epoxy to create striking, functional focal points suited to a variety of British homes from Bristol townhouses to coastal cottages in Cornwall. With careful timber selection, the right resin, considered structural planning and routine maintenance, these islands can be beautiful, durable and uniquely yours.
